Laboratory Training 5
Reflection and Multithreading
1 Training Tasks
1.1 Individual Task
Create a WPF application that displays graph of a certain function and finds its roots with certain precision. The user enters the real values of a and b, the functions f(x) and g(x) in the form of strings corresponding to the C# syntax and may include arithmetic operations, parentheses, calling standard functions, conditional operation, etc..The algorithm of the roots finding is the exhaustive search (with a certain step) of the intervals at which the function h(x) changes sign and output arithmetic mean of interval start and end. The function h(x) is determined according to the variant index:
Numbers of Variants |
Function h(x) |
Numbers of Variants |
Function h(x) |
||
|---|---|---|---|---|---|
1 |
13 |
a∙f(x) – b∙g(x) | 7 |
19 |
f(a + x) + b∙g(x) |
2 |
14 |
f(x + a) + g(x – b) | 8 |
20 |
f(a / x) – g(b∙x) |
3 |
15 |
(a-f(x))(b + g(x)) | 9 |
21 |
f(x – a) ∙g(x + b) |
4 |
16 |
f(a∙x) – g(b∙x) | 10 |
22 |
f(a / x) + g(b / x) |
5 |
17 |
f(x / a)∙ g(x + b) | 11 |
23 |
a∙f(x) + b∙g(x) |
6 |
18 |
f(a / x) – g(b / x) | 12 |
24 |
a∙f(x) – g(b∙x) |
The user should also be able to enter range of search and precision, and get the graph and roots. Root search should be performed in a separate thread. Realize the ability to pause and resume thread, as well as complete termination and re-calculation with new data.
Note: the program should be implemented to run on the .NET Framework.
1.2 Calculating π using asynchronous delegates
Implement a program that calculates π with accuracy ε as a sum of the sequence:
Calculations carried out in a separate thread of execution. When performing computing allow users to enter a request for the number of calculated terms.
Implement an approach based on the use of asynchronous delegates.
1.4 Calculating π using Thread Class
Implement the previous task using object of Thread class.
1.5 Threads Synchronization
Create a console application that calculates the product of some array items in a single thread and puts this product into a static field, while another thread calculates the sum of these items and puts this sum into another static field. After finishing of both calculations, the second thread finds the arithmetic mean of the product and sum. Use the Join() method to synchronize.
1.6 Creating a WPF Application Application for Getting Prime Factors of Numbers (Advanced Task)
Create a WPF GUI application in which the user inputs a range of numbers (from and to), and gets numbers and their prime factors. Realize the ability to pause, resume the thread, and also complete termination and re-calculation with new data.
2 Instructions
2.1 Reflection
Reflection is a mechanism that allows the program to monitor and modify its own structure and behavior at runtime. Information about the types that can be obtained through the mechanism of reflection is contained in the metadata of the assembly. The C# language provides classes Assembly, MethodInfo, PropertyInfo, FieldInfo and other types of System.Reflection namespace.
At runtime, type information can be obtained by specifying a string with the full type name (including namespaces and nested namespaces):
int k = 100;
Type type = Type.GetType("System.Int32");
MemberInfo[] members = type.GetMembers();
foreach(MemberInfo member in members)
{
    Console.WriteLine(member);
}
The result of the program will be a relatively large list of fields, methods and properties (including static members) defined in the structure of System.Int32 and its basic types.
You can also create a variable to get type information.
int k = 100;
Type type = k.GetType();
Console.WriteLine(type); // System.Int32
You can get separate information about methods, fields, and properties:
FieldInfo[] fields = type.GetFields();
MethodInfo[] methods = type.GetMethods();
PropertyInfo[] properties = type.GetProperties();
As in Java, you can use reflection to create objects of types whose names are defined by a string. You can call methods, work with fields and properties through the names defined at runtime. For example, you can create an instance of a specific class (MySpace.MyClass) and load its call method (MyFunc):
// Create an instance (object) of the class:
object o = assembly.CreateInstance("MySpace.MyClass");
// Get information about the type:
Type t = o.GetType();
// Get information about the method with the specified name:
MethodInfo mi = t.GetMethod("MyFunc");
// Call the method with parameter x:
object result = mi.Invoke(o, new object[] { x });;
C# reflection tools allow you, in addition to public data, properties, and methods, to obtain information about private type members. For example, you can get information about all fields of some type:
FieldInfo[] fields = type.GetFields(BindingFlags.NonPublic | BindingFlags.Instance);
Since through the mechanisms of reflection it is possible not only to receive information, but also to change the values of fields, call methods, etc., reflection actually allows you to bypass the limitations of encapsulation.
2.2 Metaprogramming in C#
Metaprogramming is a paradigm for constructing an information system code with a dynamic change in behavior or structure depending on the data, user actions, or interactions with other systems. Metaprogramming involves the creation of programs that generate other programs as a result of their work, or programs that change themselves during execution.
Metaprogramming can provide:
- increase code abstraction and its flexibility,
- improvement of possibilities of reuse,
- acceleration of development,
- simplification of intersystem integration.
The realization of metaprogramming is usually based on the presence of a reflection mechanism in a particular language.
Another component of metaprogramming is the possibility of creating software code and compile it. This is possible, in particular, by the classes CodeDomProvider, CompilerParameters, and other types of namespace System.CodeDom.Compiler. In combination with reflection, these capabilities can be used for a fully fledged metaprogramming. Example 3.1 shows the creation of an assembly based on information entered by the user at runtime. The automatically generated class of this compilation can be used in the program through the mechanism of reflection.
Note: build and compilation tools are available on the .NET Framework (not on the.NET Core and .NET 5).
2.3 Concepts of Multithreading
Processes are copies of a computer programs loaded into memory. In modern operating systems, the process can be executed in parallel with other processes. The process is allocated a separate address space, and this space is physically unavailable for other processes.
Threads are used to implement independent subtasks within a single process in order to implement background processes, simulate the parallel execution of certain actions or enhance the user interface's convenience.
If the process has created multiple threads, then all of them are executed in parallel, and the time of the central processor (or several central processors in multiprocessor systems) is distributed between these threads. A special module of the operating system, a so-called scheduler is responsible for this distribution of the CPU time. The scheduler assigns the CPU time to individual threads in turn, so even in the one-processor system appears an illusion of parallel work. Time distribution is performed using system timer interruptions.
Threads are used to implement independent subtasks within a single process in order to implement background processes or simulate the parallel execution of certain actions. The threading mechanism is the obligatory feature of modern operating systems. The technique of creating and interacting threads has been called multithreading.
2.4 Implementation of Multithreading in the C# Programming Language
2.4.1 Overview
The CLR usually delegates implementation of multithreading to the operating system. To work with individual threads, the .NET Framework offers the following options:
- use asynchronous delegates
- direct work with the
Threadclass - use pools of threads
- use the
BackgroundWorkerclass - thread timer
There are also other ways concerned with remote servers and web services.
Each thread uses its own call stack. The main problems of multithreading are data exchange and synchronization of threads.
2.4.2 Working with Asynchronous Delegates
The easiest way to create a separate thread execution is asynchronous delegate call. An asynchronous call means that a thread will be created to execute the method. This way, you can call any function. For an asynchronous function call, you should create a delegate type that matches this function. Next, use the BeginInvoke() method. This method is automatically determined when delegate type is created. Its first parameters coincide with the parameters of the function to be called. The last two parameters are used for callback. If the callback is not used, these parameters are set to null.
The BeginInvoke() method returns an object that implements the System.IAsyncResult interface. This object can be used to, for example, check whether the asynchronous method was finished (the IsCompleted property), or to obtain some additional information, such as the total execution time of the method.
In order to get the result of a method that was asynchronously executed, it is necessary to call the EndInvoke() function with the previously obtained object of type IAsyncResult as parameter.
For example, if this type of delegate is defined:
public delegate int SomeDelegate(double x);
The function that matches the type of the previously created delegate is also defined:
static int F(double x)
{
    // calculate and return a certain result
}
Now you can call this function asynchronously:
SomeDelegate func = F;
IAsyncResult ar = func.BeginInvoke(4.5, null, null);
A separate execution thread will be created to execute the function, and the main thread will not wait for completion of the F() function. It can do continue with its job further. After the IsCompleted property gets true, the main thread can use the result of the F() function:
while (!ar.IsCompleted)
{
    // Performing parallel work in the main thread
}
int result = func.EndInvoke(ar); // you can use the result
The C# language also supports the use of asynchronous delegates with a callback.
2.4.3 Working with the Thread Class
An approach based on the use of Thread class, provides more flexible threading control. In the simplest case, the thread object is created using the constructor with parameter of type System.Threading.ThreadStart. This is a type of delegate that describes a function with one parameter and a void result type:
public delegate void ThreadStart();
Any function that corresponds to the described delegate can be used to initialize a Thread object. Use the Start() method to execute the thread. Example:
static void Hello()
{
    Console.WriteLine("Hello, Thread!");
}

static void Main(string[] args)
{
    Thread t = new Thread(Hello);
    t.Start();
}
Once the thread has been created, it may be in one of the possible states that defines the System.Threading.ThreadState enumeration. In particular, after an object has been created, its status is set in ThreadState.Unstarted. After calling the Start() function, the state changes to ThreadState.Running. After the thread is completed, its state is set to ThreadState.Stopped. To test a state, you can use not only ThreadState property, but also the IsAlive property that returns true after calling the Start() function and until the thread is complete. Each thread can only be executed once. If you try to call the Start() method again, you'll get the exception of System.Threading.ThreadStateException type.
If you need to transfer some extra data needed by thread execution, you can create a separate class, set the necessary data values for this class, and then pass one of the methods of this class to the Thread class constructor. A simpler way is to send to the constructor a method that matches another standard delegate:
public delegate void ParameterizedThreadStart(object obj);
Now the corresponding data is passed as an argument of the Start() function. The parameter may be arbitrary, since all types are derived from the object. Example:
static void Hello(object msg)
{
    Console.WriteLine((string) msg);
}

static void Main(string[] args)
{
    Thread t = new Thread(Hello);
    t.Start("Hello, Thread!");
}
You can set names for threads. In particular, this is convenient for debug. To assign a name, use the Name property of the Thread class. The name can only be set once and then cannot be changed. You can access the main (current) thread using the static CurrentThread property of the Thread class, for example:
Thread.CurrentThread.Name = "main";
Threads are of two types: foreground and background. The foreground thread does not allow the application to quit before the end of their core functions. The execution of the background thrread's functions automatically stops when the main thread's work is finished. If some thread is started using the Start() method, it is automatically created as the foreground one. In order to turn it into a background, before calling the Start() method, the IsBackground property of the thread object should be set to true.
You can determine priorities of threads. There are 5 priority levels:
enum ThreadPriority { Lowest, BelowNormal, Normal, AboveNormal, Highest }
Setting the thread priority to a maximum does not mean working in real time, since there are still priorities for application processes.
Exceptions that are thrown in a separate thread should be processed in the same thread, since each thread uses its own call stack.
2.4.4 Threads Synchronization
Synchronization is a mechanism for ensuring explicit management of the code execution if tasks should be executed in a certain sequence. The purpose of synchronization is to prevent problems that arise when using one resource at a time with multiple threads, and also to organize information interaction between individual threads.
An important part of synchronization is the locking mechanism. The locked thread do not receive the processor time. Its state (ThreadState property) is set in WaitSleepJoin and remains in that state until it is unlocked.
There are several ways to lock the thread. The thread can be paused using the static Thread.Sleep() method, whose argument is a specified number of milliseconds (or TimeSpan object). This method causes suspension of CPU time during this period.
The thread can be blocked until another thread is finished by calling the Join() method. Calling this method inside thread t1 for thread t2 cause the current thread (t1) to pause before the finishing of t2, as shown in the following example:
using System;
using System.Threading;

namespace JoinTest
{
    class Program
    {
        static Thread t1, t2;

        static void RunFirst()
        {
            Console.WriteLine("First started");
            Thread.Sleep(1000);
            Console.WriteLine("Main work of First completed");
            t2.Join();
            Console.WriteLine("First finished");
        }

        static void RunSecond()
        {
            Console.WriteLine("Second started");
            Thread.Sleep(3000);
            Console.WriteLine("Second finished");
        }

        static void Main(string[] args)
        {
            t1 = new Thread(RunFirst);
            t1.Start();
            t2 = new Thread(RunSecond);
            t2.Start();
        }
    }
}
Synchronization problems can be shown of this example. Suppose some method inverts the value of some state variable. Assume also that we started two threads:
using System;
using System.Threading;

namespace StateChanger
{
    class Program
    {
        static bool state = false;

        static void ChangeState()
        {
            Console.WriteLine(state);
            Thread.Sleep(10); // do some work
            state = !state;
        }

        static void Main(string[] args)
        {
            new Thread(ChangeState).Start();
            new Thread(ChangeState).Start();
        }
    }
}
The result will be two False instead of False and True, as we expected. This is due to the fact that one thread has not yet changed the state, and the second one already displayed it. It is necessary to implement a mechanism that does not allow to call the ChangeState() function simultaneously by two threads. In the simplest case you can use a special construct
lock (synchronization_object)
{
    code
}
If the code of the previous example will be changed, we can get the expected result:
using System;
using System.Threading;

namespace StateChanger
{
    class Program
    {
        static bool state = false;
        static object locker = new object();

        static void ChangeState()
        {
            lock (locker)
            {
                Console.WriteLine(state);
                Thread.Sleep(10); // do some work
                state = !state;
            }
        }

        static void Main(string[] args)
        {
            new Thread(ChangeState).Start();
            new Thread(ChangeState).Start();
        }
    }
}
The synchronization object is any non-local reference type object. For non-static methods, it is recommended to use this reference as a synchronization object.
The above construct is a simplified mechanism for using the monitor. A monitor is a high-level mechanism for interaction and synchronization of processes that provides access to indivisible resources. Implementation of the monitor functions is provided by the static class System.Threading.Monitor. This class can be explicitly used in the previous example. Now, the body of the ChangeState() function will look like this:
static void ChangeState()
{
    Monitor.Enter(locker);
    try
    {
        Console.WriteLine(state);
        Thread.Sleep(10); // do some work
        state = !state;
    }
    finally
    {
        Monitor.Exit(locker);
    }
}
Of course, in this case, the lock () { } is most often used. But the Monitor class also provides other features, such as Wait() (release the block of the object and block the current thread until it receives the lock again), Pulse() (reports the thread in the waiting queue for changing the status of the locked object ), PulseAll() (Announces all expected threads, changes the status of an object), and some others.
You can also manage synchronization using attributes. The [Synchronization] attribute is described in the System.Runtime.Remoting.Contexts namespace. The class preceded by this annotation must come from System.ContextBoundObject:
using System.Runtime.Remoting.Contexts;
...

[Synchronization]
class ThreadSafeClass : ContextBoundObject
{
  ...
}
All methods of this class will be thread safe.
The best way to pause a thread is to use the Thread.Sleep() method in conjunction with the Interrupt() method, which generates the ThreadInterruptedException exception in the thread object stack. This exception causes the WaitSleepJoin state to interrupt. Example:
using System;
using System.Threading;

namespace SleepInterruption
{
    class Program
    {
        static void Sleeper()
        {
            try
            {
                Console.WriteLine("I go to sleep");
                Thread.Sleep(Timeout.Infinite); // eternal sleep
            }
            catch (ThreadInterruptedException)
            {
                Console.WriteLine("Woke up");
            }

        }

        static void Main(string[] args)
        {
            Thread t = new Thread(Sleeper);
            t.Start();
            Thread.Sleep(1000);
            t.Interrupt();
        }
    }
}
You can also call the Sleep() method in the loop with the check of the state variables.
There are also methods Suspend() and Resume() of the Thread class. These methods are considered obsolete and undesirable because they do not allow tracking the thread state and can lead to deadlocks.
2.5 Use Threads in Graphical User Interface Applications
Using multithreading in GUI application, you should not invoke methods and properties of controls in threads other than those in which they were created. This is due to the fact that managing common visual components from different threads can lead to unpredictable consequences. Instead of directly invoking the properties of visual components, you should use methods that are called from the main thread that receives and processes the events. In WPF applications, you should use the Dispatcher property of Dispatcher type, which is present in the window object. In particular, the CheckAccess() function returns true if components can be accessed directly. Otherwise, we call the Invoke() function, which is also present in the Dispatcher class.
An alternative way to implement multithreading is using of the BackgroundWorker component. This component uses an event-driven multithreading model. The thread that creates the controls executes the ProgressChanged and RunWorkerCompleted event handlers.
3 Sample Programs
3.1 Creation of WPF Application for Plotting Arbitrary Function
Suppose we want to create a WPF application that allows user to enter an arbitrary function and build a graph. The user enters the function in a TextBox. It is necessary to provide an opportunity to enter an expression of arbitrary complexity, which can include arithmetic operations, brackets, call of standard functions, conditional operation, etc. In general user can enter everything that can be used in an expression that returns a real value. The only variable can be x, all other values are determined by explicit constants.
We create a new WPF application first, for instance, WPFGraph. We change the title of the header title (Title) to "Construct an arbitrary function graph". It is advisable to limit the minimum size of the window (MinWidth and MinHeight), for example, with values 464 and 115.
Grid should be divided into two horizontal parts (by visual means or manually):
    <Grid.RowDefinitions>
        <RowDefinition Height="90*" />
        <RowDefinition Height="334*" />
    </Grid.RowDefinitions>
In order for the upper part of the grid to have a fixed height, we remove the star after the Height value (in our case, after 90).
Now we add another grid (gridTop) to the top of our grid. Properties Height, HorizontalAlignment, Margin, VerticalAlignment, and Width of gridTop should be reset to the default values. The background color (Background property) should be set to LightGray. New grid should contain an input string (TextBox) called TextBoxFunction, a button (Button) called ButtonRedraw, two identical group boxes (GroupBox), respectively GroupBoxX and GroupBoxY, each of which contains two labels and two input lines for determine the range of the graph for each coordinate. Necessary default values of ranges can be set in property editor.
The bottom of the form will contain CanvasGraph component of the Canvas type. It's a simple panel, to which we can, in particular, add graphic primitives. The CanvasGraph component also needs to reset Height, HorizontalAlignment, Margin, VerticalAlignment, and Width properties to the default values. After all necessary settings were done, we get the XAML code like this:
<Window x:Class="WPFGraph.MainWindow"
        xmlns="http://schemas.microsoft.com/winfx/2006/xaml/presentation"
        xmlns:x="http://schemas.microsoft.com/winfx/2006/xaml"
        xmlns:d="http://schemas.microsoft.com/expression/blend/2008"
        xmlns:mc="http://schemas.openxmlformats.org/markup-compatibility/2006"
        xmlns:local="clr-namespace:WPFGraph"
        mc:Ignorable="d"
        Title="Plotting arbitrary function"
        Height="460" Width="468" MinWidth="464" MinHeight="115">
    <Grid>
        <Grid.RowDefinitions>
            <RowDefinition Height="90" />
            <RowDefinition Height="334*" />
        </Grid.RowDefinitions>
        <Grid Grid.Row="0" Background="LightGray">
            <TextBox Height="24" HorizontalAlignment="Left" Margin="6,6,0,0"
                     Name="TextBoxFunction" VerticalAlignment="Top" Width="343" />
            <GroupBox Header="X" Height="51" HorizontalAlignment="Left" Margin="8,36,0,0"
                      Name="GroupBoxX" VerticalAlignment="Top" Width="220">
                <Grid>
                    <Label Content="From" Height="32" HorizontalAlignment="Left" Margin="6,6,0,0"
                           Name="LabelXFrom" VerticalAlignment="Top" Width="33" />
                    <TextBox Height="23" HorizontalAlignment="Right" Margin="0,6,112,0"
                             Name="TextBoxXFrom" VerticalAlignment="Top" Width="62" Text="-5" />
                    <Label Content="To" Height="26" HorizontalAlignment="Left" Margin="110,6,0,0"
                           Name="LabelXTo" VerticalAlignment="Top" Width="33" />
                    <TextBox Height="23" HorizontalAlignment="Left" Margin="138,6,0,0"
                             Name="TextBoxXTo" VerticalAlignment="Top" Width="62" Text="5" />
                </Grid>
            </GroupBox>
            <GroupBox Header="Y" Height="51" HorizontalAlignment="Left" Margin="230,36,0,0"
                      Name="GroupBoxY" VerticalAlignment="Top" Width="220">
                <Grid>
                    <Label Content="From" Height="32" HorizontalAlignment="Left" Margin="6,6,0,0"
                           Name="LabelYFrom" VerticalAlignment="Top" Width="33" />
                    <TextBox Height="23" HorizontalAlignment="Left" Margin="34,6,0,0"
                             Name="TextBoxYFrom" VerticalAlignment="Top" Width="62" Text="-5" />
                    <Label Content="To" Height="26" HorizontalAlignment="Left" Margin="110,6,0,0"
                           Name="LabelYTo" VerticalAlignment="Top" Width="33" />
                    <TextBox Height="23" HorizontalAlignment="Left" Margin="138,6,0,0"
                             Name="TextBoxYTo" VerticalAlignment="Top" Width="62" Text="5" />
                </Grid>
            </GroupBox>
            <Button Content="Redraw" Height="25" HorizontalAlignment="Left" Margin="355,5,0,0"
                    Name="ButtonRedraw" VerticalAlignment="Top" Width="94" />
        </Grid>
        <Canvas Grid.Row="1" Name="CanvasGraph" />
    </Grid>
</Window>
After starting program, the main window of the future application will look like this:
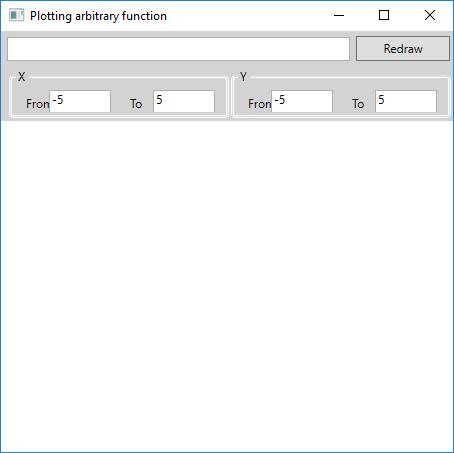
The main problem of the project is the implementation of the input an arbitrary function. In order to recognize a function that was typed by user, in general it is necessary to build a parser. The implementation of a parser is a complicated task of programming, which requires the creation of our own compiler (interpreter) of complex expressions. But thanks to the possibilities of reflection, instead of creating our own translator we can use the features of the C# compiler.
We add a new class (Project | Add Class ...) called FunctionFromString, whose code will be allocated in the FunctionFromString.cs file. Since our class will use reflexion, the using system.reflection directive be added to the using-directives. We also need a namespace System.CodeDom.Compiler. The source code will look like this:
// FunctionFromString.cs
using System;
using System.Collections.Generic;
using System.Reflection;
using System.CodeDom.Compiler;

namespace WPFGraph
{
    public class FunctionFromString
    {
        // Reference to the assembly, which will be created programmatically:
        private Assembly assembly = null;

        // Compiles a program that calculates a given function
        public bool Compile(string str)
        {
            // A class that provides compilation capabilities:
            CodeDomProvider icc = CodeDomProvider.CreateProvider("CSharp");

            // Parameters of the compiler:
            CompilerParameters cp = new CompilerParameters();
            cp.ReferencedAssemblies.Add("system.dll"); // adding asstmbly
            cp.CompilerOptions = "/t:library"; // create a library
            cp.GenerateInMemory = true; // create an assembly in memory

            // Create a string that contains the source code of the Func class
            StringBuilder sb = new StringBuilder("");
            sb.Append("using System;\n");
            sb.Append("namespace Func{ \n");
            sb.Append("public class Func{ \n");
            sb.Append("public double MyFunc(double x){\n");
            // From the MyFunc function we return an expression obtained in the form of a string:
            sb.Append("return " + str + "; \n");
            sb.Append("} \n");
            sb.Append("} \n");
            sb.Append("}\n");

            // Perform compilation:
            CompilerResults cr = icc.CompileAssemblyFromSource(cp, sb.ToString());
            if (cr.Errors.Count > 0)
            {
                return false;
            }
            assembly = cr.CompiledAssembly;
            return true;
        }

        public double? F(double x)
        {
            if (assembly == null)
            {
                return null; // Assembly was not created
            }
            // Create an instance (class object):
            object o = assembly.CreateInstance("Func.Func");
            // Get information about the type:
            Type t = o.GetType();
            // Get information about the method with the specified name:
            MethodInfo mi = t.GetMethod("MyFunc");
            // Call the method with the x parameter:
            object result = mi.Invoke(o, new object[] { x });
            return (double)result;
        }

    }
}
Now we can go back to creating the graphical user interface application. We need to add the event handler functions associated with pressing the ButtonRedraw button and changing the size of the CanvasGraph component:
private void ButtonRedraw_Click(object sender, RoutedEventArgs e)
{

}

private void CanvasGraph_SizeChanged(object sender, SizeChangedEventArgs e)
{

}
Unlike Windows.Forms, drawing is done not by identifying handler of the Paint event, but by adding geometric shapes, in particular lines, to the panel. The text of the MainWindow.xaml.cs file will look like this:
using System;
using System.Collections.Generic;
using System.Linq;
using System.Text;
using System.Windows;
using System.Windows.Controls;
using System.Windows.Data;
using System.Windows.Documents;
using System.Windows.Input;
using System.Windows.Media;
using System.Windows.Media.Imaging;
using System.Windows.Navigation;
using System.Windows.Shapes;

namespace WPFGraph
{
    /// <summary>
    /// Interaction logic for MainWindow.xaml
    /// </summary>
    public partial class MainWindow : Window
    {
        private bool draw = false;
        private FunctionFromString function = new FunctionFromString();
        private double xMin = -5, xMax = 5, yMin = -5, yMax = 5;

        public MainWindow()
        {
            InitializeComponent();
        }

        private void ButtonRedraw_Click(object sender, RoutedEventArgs e)
        {
            // Reading data from TextBox
            // If the text is not a number, previous values will be restored:
            try   { xMin = double.Parse(TextBoxXFrom.Text); }
            catch { TextBoxXFrom.Text = xMin + "";          }
            try   { xMax = double.Parse(TextBoxXTo.Text);   }
            catch { TextBoxXTo.Text = xMax + "";            }
            try   { yMin = double.Parse(TextBoxYFrom.Text); }
            catch { TextBoxYFrom.Text = yMin + "";          }
            try   { yMax = double.Parse(TextBoxYTo.Text);   }
            catch { TextBoxYTo.Text = yMax + "";            }

            if (xMax <= xMin || yMax <= yMin) // Wrong range
            {
                MessageBox.Show("Error setting range", "Error", MessageBoxButton.OK, MessageBoxImage.Error);
                draw = false;
                DrawGraph();
                return;
            }

            if (function.Compile(TextBoxFunction.Text)) // The function is defined correctly
            {
                draw = true;
                DrawGraph();
            }
            else
            {
                MessageBox.Show("Error in function", "Error", MessageBoxButton.OK, MessageBoxImage.Error);
            }
        }

        private void CanvasGraph_SizeChanged(object sender, SizeChangedEventArgs e)
        {
            DrawGraph();
        }

        // Adding line of a particular type
        private void AddLine(Brush stroke, double x1, double y1, double x2, double y2)
        {
            CanvasGraph.Children.Add(new Line() { X1 = x1, X2 = x2, Y1 = y1, Y2 = y2, Stroke = stroke });
        }

        // Adding text
        private void AddText(string text, double x, double y)
        {
            TextBlock textBlock = new TextBlock();
            textBlock.Text = text;
            textBlock.Foreground = Brushes.Black;
            // Determining the coordinates of the block. "Attached" properties
            Canvas.SetLeft(textBlock, x);
            Canvas.SetTop(textBlock, y);
            CanvasGraph.Children.Add(textBlock);
        }

        // The main function of drawing graph with axes and grid
        private void DrawGraph()
        {
            CanvasGraph.Children.Clear();
            if (!draw)
            {
                return;
            }
            double width = CanvasGraph.ActualWidth;
            double height = CanvasGraph.ActualHeight;
            double xScale = width / (xMax - xMin);
            double yScale = height / (yMax - yMin);
            double x0 = -xMin * xScale;
            double y0 = yMax * yScale;

            // Grid:
            double xStep = 1; // grig step
            while (xStep * xScale < 25)
            {
                xStep *= 10;
            }
            while (xStep * xScale > 250)
            {
                xStep /= 10;
            }
            for (double dx = xStep; dx < xMax; dx += xStep)
            {
                double x = x0 + dx * xScale;
                AddLine(Brushes.LightGray, x, 0, x, height);
                AddText(string.Format("{0:0.###}", dx), x + 2, y0 + 2);
            }
            for (double dx = -xStep; dx >= xMin; dx -= xStep)
            {
                double x = x0 + dx * xScale;
                AddLine(Brushes.LightGray, x, 0, x, height);
                AddText(string.Format("{0:0.###}", dx), x + 2, y0 + 2);
            }
            double yStep = 1;  // grig step
            while (yStep * yScale < 20)
            {
                yStep *= 10;
            }
            while (yStep * yScale > 200)
            {
                yStep /= 10;
            }
            for (double dy = yStep; dy < yMax; dy += yStep)
            {
                double y = y0 - dy * yScale;
                AddLine(Brushes.LightGray, 0, y, width, y);
                AddText(string.Format("{0:0.###}", dy), x0 + 2, y - 2);
            }
            for (double dy = -yStep; dy > yMin; dy -= yStep)
            {
                double y = y0 - dy * yScale;
                AddLine(Brushes.LightGray, 0, y, width, y);
                AddText(string.Format("{0:0.###}", dy), x0 + 2, y - 2);
            }

            // Axes
            AddLine(Brushes.Black, x0, 0, x0, height);
            AddLine(Brushes.Black, 0, y0, width, y0);
            AddText("0", x0 + 2, y0 + 2);
            AddText("X", width - 10, y0 - 14);
            AddText("Y", x0 - 10, 2);

            // Draw a function if it is defined:
            {
                Polyline polyline = new Polyline() { Stroke = Brushes.Red, ClipToBounds = true };
                if (function.F(-x0 / xScale) == null)
                {
                    return;
                }
                for (int x = 0; x < width; x++)
                {
                    double dy = (double)function.F((x - x0) / xScale);
                    if (double.IsNaN(dy) || double.IsInfinity(dy))
                    {
                        continue;
                    }
                    // Received a "normal" number
                    polyline.Points.Add(new Point(x, y0 - dy * yScale));
                }
                CanvasGraph.Children.Add(polyline);
            }
        }

    }
}
The DrawGraph() method uses the AddLine() and AddText() functions to add a line and text.
Use of Asynchronous Delegates
Suppose we need to create a function that calculates π by finding x at which the minimum of cos(x) is reached. Since we will use an exhausted search of the minimum (passing a certain interval with a small step that actually determines the accuracy of finding π), the computational process can take a long time. Therefore, we'll create a separate thread for it, and in the main thread the user can perform other actions, for example, to calculate second powers of numbers. The program will look like this:
using System;

namespace Asynchronous
{
    public delegate int SomeDelegate(double x);

    public delegate double SearchProcedure(double from, double to, double eps);

    class Program
    {
        static double GetPi(double from, double to, double eps)
        {
            double min = from;
            for (double x = from; x <= to; x += eps)
            {
                if (Math.Cos(x) < Math.Cos(min))
                {
                    min = x;
                }
            }
            return min;
        }

        static void Main(string[] args)
        {
            SearchProcedure proc = GetPi;
            Console.WriteLine("We begin to calculate pi");
            IAsyncResult ar = proc.BeginInvoke(2, 4, 0.0000001, null, null);
            Console.WriteLine("While counting the second powers");
            while (!ar.IsCompleted)
            {
                Console.Write("Enter the number: ");
                double x = double.Parse(Console.ReadLine());
                Console.WriteLine("The second power of the number: " + x * x);
            }
            double pi = proc.EndInvoke(ar);
            Console.WriteLine("Finally found: " + pi);
        }
    }
}
For each number it is guaranteed that the second power will be calculated and shown, even if the particular thread has already completed its work.
3.2 Creating a Windows Forms Application for Calculating and Displaying Prime Numbers
Suppose it is necessary to develop a program for obtaining primes in the range from 1 to a certain value, which can be quite large. To find primes we will use the simplest algorithm for sequential checking of all numbers from 2 to the square root of the verifiable number. Such a check may take a long time. To create a user-friendly interface, it's advisable to use a separate thread that checks numbers. This will allow us to pause and resume searches, perform standard window manipulations, including closing them before the search is completed.
We create a new WPF project named PrimeApp. The title of the window is changed to "Prime numbers".
In the main grid we define three rows:
<Grid.RowDefinitions>
    <RowDefinition Height="38"/>
    <RowDefinition Height="365*"/>
    <RowDefinition Height="30"/>
</Grid.RowDefinitions>
In the uppermost row we place the LabelTo label with "To:" text and the TextBoxTo text box (with the text "10000"). We also add buttons "Start" (ButtonStart), "Pause" (ButtonSuspend), "Resume" (ButtonResume) and "Finish" (ButtonFinish).
We add a text box (TextBoxPrimeNumbers) to the row with index 1. In the last row (with index 2) we allocate the ProgressBar execution indicator (ProgressBarPercentage). The MainWindow.xaml file will look like this:
<Window x:Class="PrimeApp.MainWindow"
        xmlns="http://schemas.microsoft.com/winfx/2006/xaml/presentation"
        xmlns:x="http://schemas.microsoft.com/winfx/2006/xaml"
        xmlns:d="http://schemas.microsoft.com/expression/blend/2008"
        xmlns:mc="http://schemas.openxmlformats.org/markup-compatibility/2006"
        xmlns:local="clr-namespace:PrimeApp"
        mc:Ignorable="d"
        Title="Prime Numbers"
        Height="468"
        Width="727">
    <Grid>
        <Grid.RowDefinitions>
            <RowDefinition Height="38"/>
            <RowDefinition Height="365*"/>
            <RowDefinition Height="30"/>
        </Grid.RowDefinitions>
        <Label Content="Till"
               HorizontalAlignment="Left"
               Margin="10,10,0,0"
               VerticalAlignment="Top"/>
        <TextBox x:Name="TextBoxTo"
                 HorizontalAlignment="Left"
                 Height="23"
                 Margin="38,10,0,0"
                 TextWrapping="Wrap"
                 Text=""
                 VerticalAlignment="Top"
                 Width="90"/>
        <Button x:Name="ButtonStart"
                Content="Start"
                HorizontalAlignment="Left"
                Margin="133,10,0,0"
                VerticalAlignment="Top"
                Width="111"
                Height="23"
                Click="ButtonStart_Click"/>
        <Button x:Name="ButtonSuspend"
                Content="Suspend"
                HorizontalAlignment="Left"
                Margin="249,10,0,0"
                VerticalAlignment="Top"
                Width="111"
                Height="23"
                Click="ButtonSuspend_Click"/>
        <Button x:Name="ButtonResume"
                Content="Resume"
                HorizontalAlignment="Left"
                Margin="365,11,0,0"
                VerticalAlignment="Top"
                Width="111"
                Height="23"
                Click="ButtonResume_Click"/>
        <Button x:Name="ButtonFinish"
                Content="Finish"
                HorizontalAlignment="Left"
                Margin="481,10,0,0"
                VerticalAlignment="Top"
                Width="111"
                Height="23"
                Click="ButtonFinish_Click"/>
        <TextBox x:Name="TextBoxPrimeNumbers"
                 Grid.Row="1"
                 VerticalScrollBarVisibility="Visible" />
        <ProgressBar x:Name="ProgressBarPercentage" Grid.Row="2" />
    </Grid>
</Window>
For direct searching of primes, it is advisable to create a separate PrimeNumbers class, which calls a function defined by a delegate with an integer parameter. Similarly, we call a function that should represent the found numbers. A callback allows us to remove the class dependence from any visual component. The class code will look like this:
namespace PrimeApp
{
    public delegate void NumberSetter(int number);

    public class PrimeNumbers
    {
        public double To { get; set; }
        public NumberSetter AddNumber { get; set; }
        public NumberSetter SetPercentage { get; set; }
        public bool Stop { get; set; }

        public PrimeNumbers()
        {
            To = 0;
            AddNumber = null;
            SetPercentage = null;
            Stop = false;
        }

        public void FindPrimeNumbers()
        {
            for (int n = 2; n <= To; n++)
            {
                if (SetPercentage != null)
                {
                    SetPercentage((int)(n * 100 / To));
                }
                bool prime = true;
                for (int i = 2; i * i <= n; i++)
                {
                    if (n % i == 0)
                    {
                        prime = false;
                        break;
                    }
                }
                if (prime && AddNumber != null)
                {
                    AddNumber(n);
                }
                if (Stop)
                {
                    break;
                }
            }
        }
    }
}
In the MainWindow class add reference to the PrimeNumbers class.
To provide thread-safe access to visual components we call Dispatcher.CheckAccess() (instead of InvokeRequired, with the opposite interpretation of the result). Instead of this.Invoke() we use Dispatcher.Invoke(). Add event handlers. Get the source code of the MainWindow.xaml.cs class:
using System;
using System.Collections.Generic;
using System.Linq;
using System.Text;
using System.Threading;
using System.Windows;
using System.Windows.Controls;
using System.Windows.Data;
using System.Windows.Documents;
using System.Windows.Input;
using System.Windows.Media;
using System.Windows.Media.Imaging;
using System.Windows.Navigation;
using System.Windows.Shapes;

namespace PrimeApp
{
    /// <summary>
    /// Interaction logic for MainWindow.xaml
    /// </summary>
    public partial class MainWindow : Window
    {
        PrimeNumbers prime;
        Thread numbersThread;
        bool paused;

        public MainWindow()
        {
            InitializeComponent();
        }

        void AddNumber(int number)
        {
            if (Dispatcher.CheckAccess())
            {
                TextBoxPrimeNumbers.Text += number + Environment.NewLine;
            }
            else
            {
                Dispatcher.Invoke(new NumberSetter(AddNumber), new object[] { number });
            }
        }

        void SetPercentage(int number)
        {
            if (!Dispatcher.CheckAccess())
            {
                Thread.Sleep(20);
                while (paused)
                {
                    Thread.Sleep(20);
                }
                Dispatcher.Invoke(new NumberSetter(SetPercentage), new object[] { number });
            }
            else
            {
                ProgressBarPercentage.Value = number;
                if (number >= 99)
                {
                    ButtonStart.IsEnabled = true;
                    ButtonSuspend.IsEnabled = false;
                    ButtonFinish.IsEnabled = false;
                    TextBoxPrimeNumbers.SelectionLength = 0;
                }
            }
        }

        private void ButtonStart_Click(object sender, RoutedEventArgs e)
        {
            try
            {
                prime = new PrimeNumbers();
                prime.To = int.Parse(TextBoxTo.Text);
                prime.AddNumber = this.AddNumber;
                prime.SetPercentage = this.SetPercentage;
                ButtonStart.IsEnabled = false;
                ButtonSuspend.IsEnabled = true;
                ButtonFinish.IsEnabled = true;
                paused = false;
                TextBoxPrimeNumbers.Text = "";
                numbersThread = new Thread(prime.FindPrimeNumbers);
                numbersThread.IsBackground = true;
                numbersThread.Start();
            }
            catch
            {
                MessageBox.Show("Check the data!", "Error");
            }
        }

        private void ButtonSuspend_Click(object sender, EventArgs e)
        {
            ButtonSuspend.IsEnabled = false;
            ButtonResume.IsEnabled = true;
            paused = true;
        }

        private void ButtonResume_Click(object sender, EventArgs e)
        {
            ButtonSuspend.IsEnabled = true;
            ButtonResume.IsEnabled = false;
            paused = false;
        }

        private void ButtonFinish_Click(object sender, EventArgs e)
        {
            prime.Stop = true;
            ButtonStart.IsEnabled = true;
            ButtonSuspend.IsEnabled = false;
            ButtonResume.IsEnabled = false;
            ButtonFinish.IsEnabled = false;
            TextBoxPrimeNumbers.SelectionLength = 0;
        }
    }
}
As can be seen from the following text, the program may be in several states. The state affects the availability of different buttons.
4 Exercises
- Implement a program that calculates the minimum of a function in a given interval. Use asynchronous delegates.
- Implement a program that calculates the maximum of a function in a given interval. Use
Threadclass. - Create a program that demonstrates the
Join()method. - Create a program that demonstrates the
lock ()construct. - Create a program that demonstrates the ability to pause and resume threads.
5 Quiz
- What is the concept of metaprogramming?
- What is the meaning of reflection?
- How to create an object, identifying the class name at runtime?
- How to call a method, defining its name at runtime?
- What is the difference between processes and threads?
- How to work with asynchronous delegates?
- How to create thread using
Threadclass? - How toI transfer the data to a function that runs in a separate thread?
- What is the difference between the foreground and the background threads?
- How to determine thread priorities?
- What is the problem of synchronizing threads?
- How to pause thread?
- Explain the work of the
lock ()construction. - What is a monitor?
- How to pause and resume the thread?
- What are the limitations of using multithreading in applications of the graphical user interface?